The Making: Owl Cake


Hi today I'm going to be writing about how I made a cute owl cake.
 This cake design is not mine as I based this cake on the photo that the client gave me but I tweaked it a bit to make it mine. Basically, this owl cake design involved drawing a lot of circles and I used whatever I had at hand like cutters and even cointainer covers to achieve that. You could use a proper geometric tool called a compass to do that too..but I think I lost it after high school so yeah I didn't bother with that!
This is how it looked like after the drawing was done on an 8 inch round paper.
This cake design involves layering so I had to figure out which layer to put on first and decided that the feather on the chest of the owl should go first. I made these using a medium rose cutter and cut the petals one by one...
...and stuck it on the round owl body base like so starting from the bottom.
Next, I made top part of the owl using brown fondant and cut it like so.

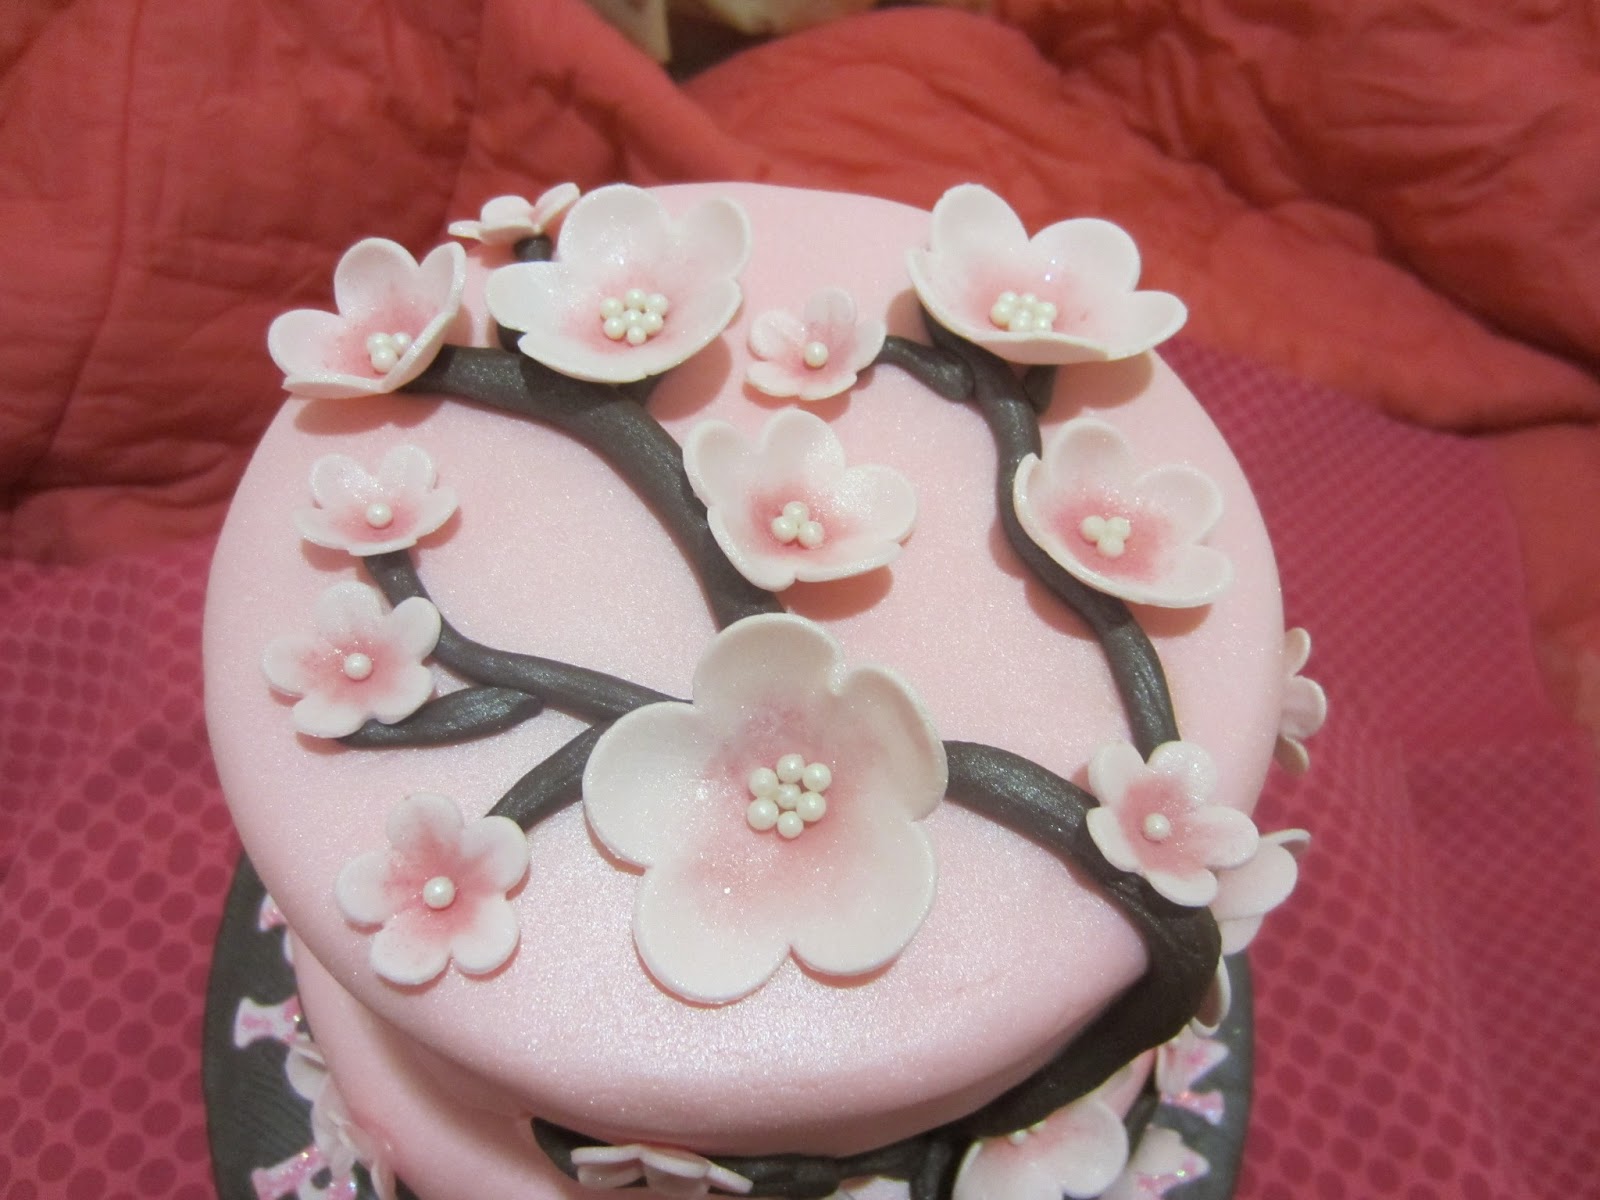
I won't go too much into the detailing of the cake because it basically involved making a few sugar flowers and leaves stuck on a tree trunk with branches which is quite straightforward. The eyes were simple fondant cut out in circles and stuck on based on the drawing I made.
Here you can see I added some colourful hearts on the sides of the cake.
Another view from the top.
Side views again. I think the fondant based which was embossed with the lattice texture mat complimented the whole look of the cake.
So there you have a cute pink girly owl cake!


The Making: Sakura Cake


Hi! I should have written this post since earlier this year but anyway I made this cake for a pretty lady around Chinese New Year period for her birthday and it's a pink sakura cake :)
First, I used a medium rose cutter to cut out the petals and imprinted the veins to make it have some sort of  texture and look more realistic.
Then I used a ball tool and another tool to cup the petals and indent the centre.

Then I put them on the flower cups  and brushed some pink petal dust in the centre to make it have some depth.
Also brushed on some pink edible glitter for a lovely shining effect.
I cut out more blossoms with a smaller blossom cutter and did the same as the larger blossoms to all of them.
After drying, I put some sugar pearls in the centre using gumpaste glue.
While waiting for the blosoms to dry completely, I prepared the board to make it look like it was a piece of hardgrained wood.

Once the cake was covered with fondant,I covered the bottom edges with shapes molded from a sillicone border mold.

After that I marked, where the branches would go on the cake freehand. This is where your artistic judgement comes out!
I first stuck on the main branch.
I even made a branch looking like a snake..you know..because 2013 is the year of the Snake! heheh..
Here I'm showing you how I made the main trunk as if  'growing out' of the 'wooden' board.
Here you see how the branches wrapped around the entire cake.

Then after that I simple stuck on the dried sugar blossoms all around the branches and it was done!


All the other angles of this flowery cake.
Pretty cake for a pretty lady all done :))