Princess Doll cake and Rock n Fire electric guitar..:The Making

In this post I will talk about my latest projects the Princess Doll cake and the Rock and Fire electric guitar cake. I know some of my friends said I should charge a fee for sharing my techniques or not share any trade secrets but it really is not that complicated as I only applied what I had learnt from my classes at ICCA and a bit of common sense with a dash of concentration to details. So here goes..

This is the first cake : A princess doll cake with special ruffle details on her skirt. The cake is a buttery vanilla cake with buttercream and fondant on top.
This is the second cake and I named it the Rock and Fire electric guitar cake. This cake is of chocolate truffle flavour and is made entirely of buttercream. Quite a challenge actually because I had to achieve the look of a fondant cake.


Okay let's start with the doll cake. As you can see this cake is mostly in the 'skirt' of the doll. Client wanted a ruffle-y look to the skirt. It was impossible to achieve with just fondant so I had to mix in a little bit of gum paste so that I could roll it thin enough work with. Fondant itself was too soft to manipulate into ruffles and would fall flat once stacked unto the cake.

In order to achieve the ruffles, I rolled a thin layer of fondant cut with a round cookie cutter and then cut again in half to form a semi-circle. I then used a ball tool  and the same technique as forming petals in flowers was applied.
I let them dry on a flower former to stiffen them up a bit before layering them on the cake. I then arranged them on to the cake before they got too stiff. Every once in a while I shaped the ruffles with my ball tool once on the cake to maintain their shape.

Once done I glued on white pearl sugar beads on the ruffles and finished off with the top part of the dress complete with a belt and necklace..
In better lighting.


I then decorated with some of my sugar lillies, a couple of hearts and the writing.

Finished off with a tiny tiara and then ready and packed into the cake box.
On to my next cake, the electric guitar! As you can see, I baked using the Wilton guitar pan. I had to make sure the cake would fill the pan once baked so I put in a quite a lot of batter and that explains the crack. It baked beautifully though and had a wonderful texture to work with. I leveled off the dome part and elongated the handle part with more cake that I  had baked separately.

I turned it over on the cake board and brushed the crumbs away.This was the challenging part: How was I supposed to create black buttercream without it tasting too bitter?  I found the answer  by mixing black chocolate powder  imported from Spain with the Wilton buttercream recipe along with  a little black coloring gel. Mind you it was still a bit grey when I finished mixing but just as the forums I read told me that you have to wait a few minutes for the colour to darken. And it did turn a beautiful black sheen. Then I covered the cake first with a crumb coat and then a second layer and smoothed it over to dry.

Next was the 'fun' part or shall I say the creative part. I marked the fire motif on the guitar free hand using a spatula unto the buttercream surface as above.

This was the tedious part as I painstakingly outlined and filled in the space with golden yellow buttercream using tip No.2 and then slowly brushed it smooth. I let it 'dry' for 10 minutes and then smoothed it over with parchment paper incorporating it into the black buttercream.

This is the magic stuff that created the 'FIRE'. I sprayed this wonder product unto the yellow buttercream to achieve the flame look. I should invest in a proper airbrush one day but this will do I guess :)
I then completed all other details on the guitar like the strings and knobs.

How did I achieve the silvery look on the knobs? By mixing silver lustre edible powder  with clear vanilla and painting them on. This was when I was working for my money. Details..details..details .. :D

Some ball borders and one electric cake guitar DONE!
Piped the writings and cake was complete.

Another look at the pretty Princess Doll. I loved how the ruffles caught the light and produced shadows underneath.
Oh by the way, I also made 3 dozen cupcakes. Colourful colourful cupcakes!

Finally another look at my Fire and Rock electric guitar cake. I was proud with the work done and actually learned a lot by doing it. What's that long silver thingy there you ask? He said I should pipe a cable since it's 'electric'. Okaylah. So I did.

There you go I hope you enjoyed the making of these cakes and learned along with me. I really hope my client enjoyed these cakes as I enjoyed making and designing them. :D

Wilton cake Decorating Course 2 : Class 3 and Graduation

 Hello friends yup this is the final blog concerning Course Two in my cake decorating adventure..Sorry it took so long to update as I was completely knackered from all the baking and flower making and needed some well deserved rest. Well let me tell ya..making flowers out of royal icing is truly a skill to be reckoned with...the amount of concentration needed is enormous and one wrong move and your flower goes kaput!! So here is the documentation of class 3 and the final graduation class. WARNING : There are a lot of pictures! Hehe..
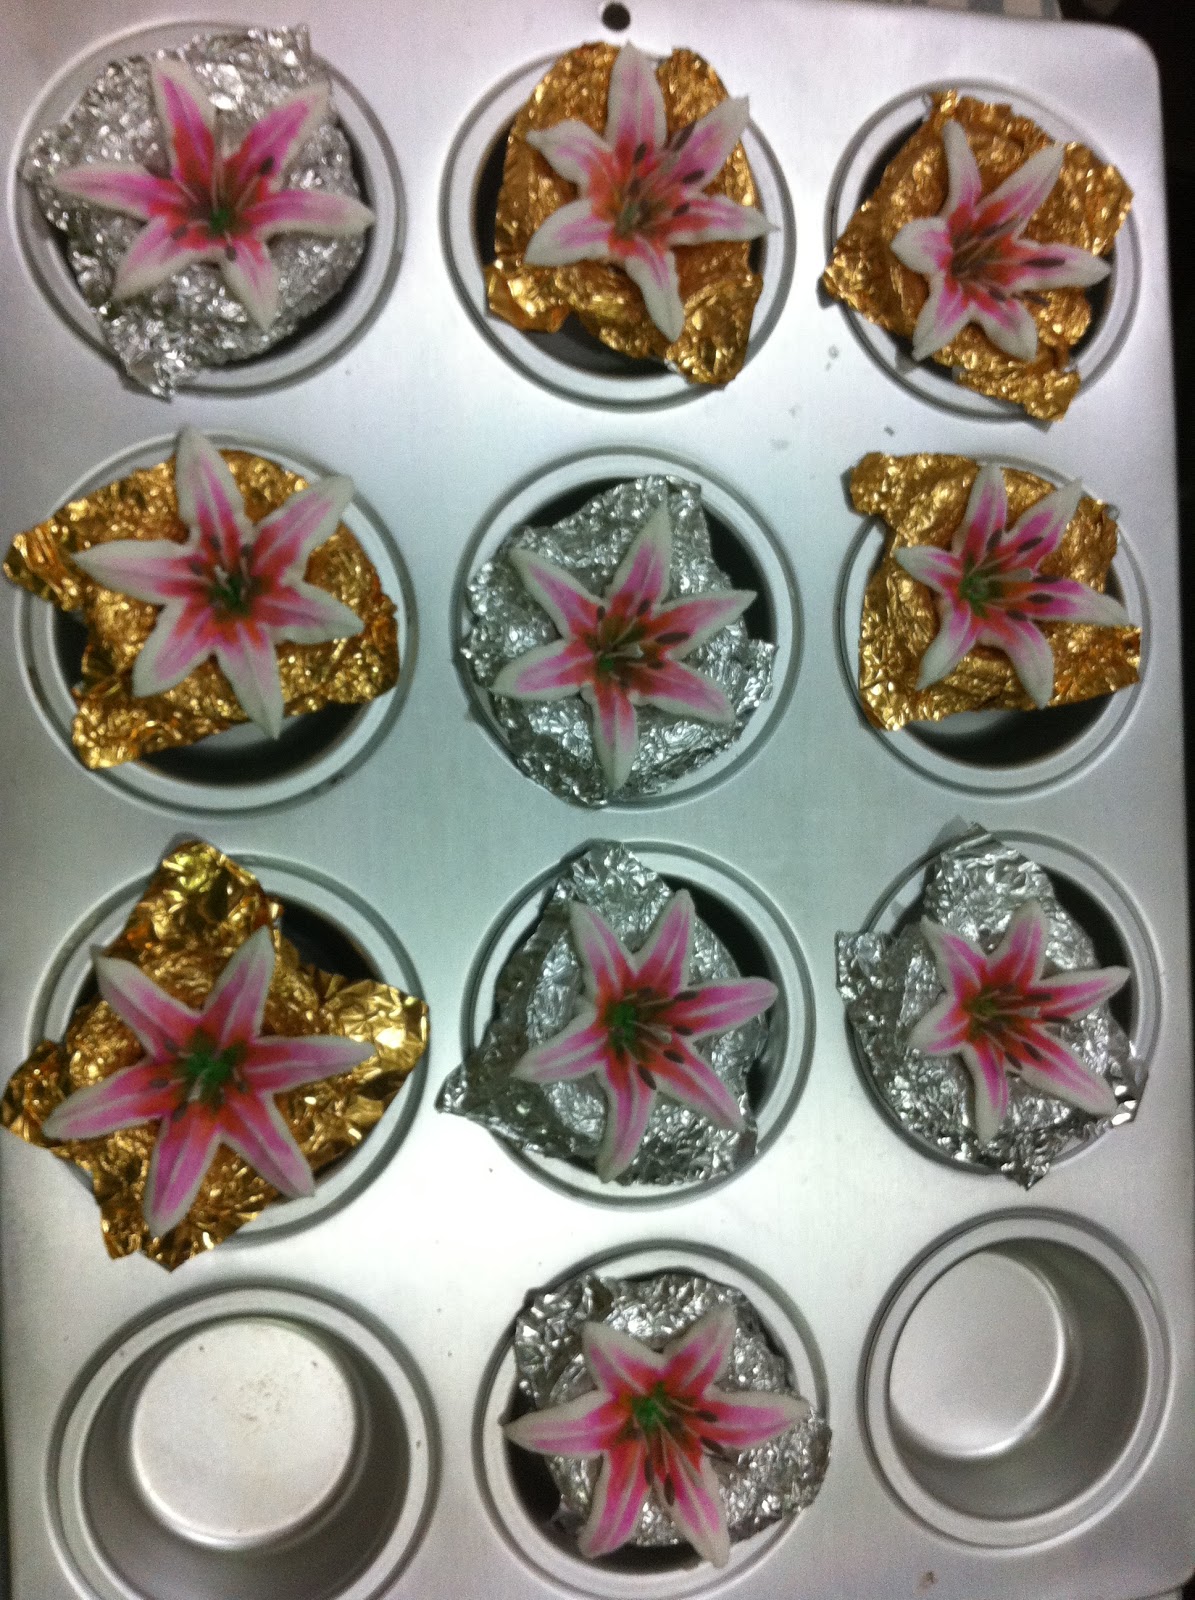
All handpainted and here I am letting it dry on a piece of foil on my muffin pan.
In class 3, we were taught on how to pipe all kinds of flowers. We made flowers using royal icing which is an icing that has tons of meringue powder so that it sets to be hard. So here is my favourite among all the flowers...LILLIES! At first I made a mistake by piping five petals instead of six..I had made 12 until I realised they were all wrong.Then I had to do it all over again with six petals..phewwh..well all I can say, practice makes perfect!

We did the Wilton Rose again (in orange) and the ribbon rose (in bright pink). Both beautiful but using different techniques.

As promised my improved pansies made using gum paste.

These are my apple blossoms (left) and my primroses (right)

These are my lovely bright daffodils
I like making these I don't know why..perhaps because it's a sunny colour and I find the corn starch pinching of the petals a very fascinating technique.

 These are my violets...for these I would have preferred a darker purplish colour though ..still they're cute :)

Now this is the preparation of my Course Two final graduation cake.I baked a three layer chocolate cinnamon cake. This cake was a moist aromatic wonder and quite heavy after all that layering. In the background, you can see the meringue powder which to me is super expensive but also super useful especially in the making of buttercreams and icing. For those who don't know, meringue powder is basically powdered egg whites.
This was after crumb coating the three layers with buttercream

 Back in class for the final day of course two and we learned the reverse shell borders, rosettes and the basketweave
 Doing it on the practice board was one thing but doing the basketweave on the actual cake was another.It was time consuming and required some concentration indeed. Oh and did I mention, you need a LOT of buttercream!

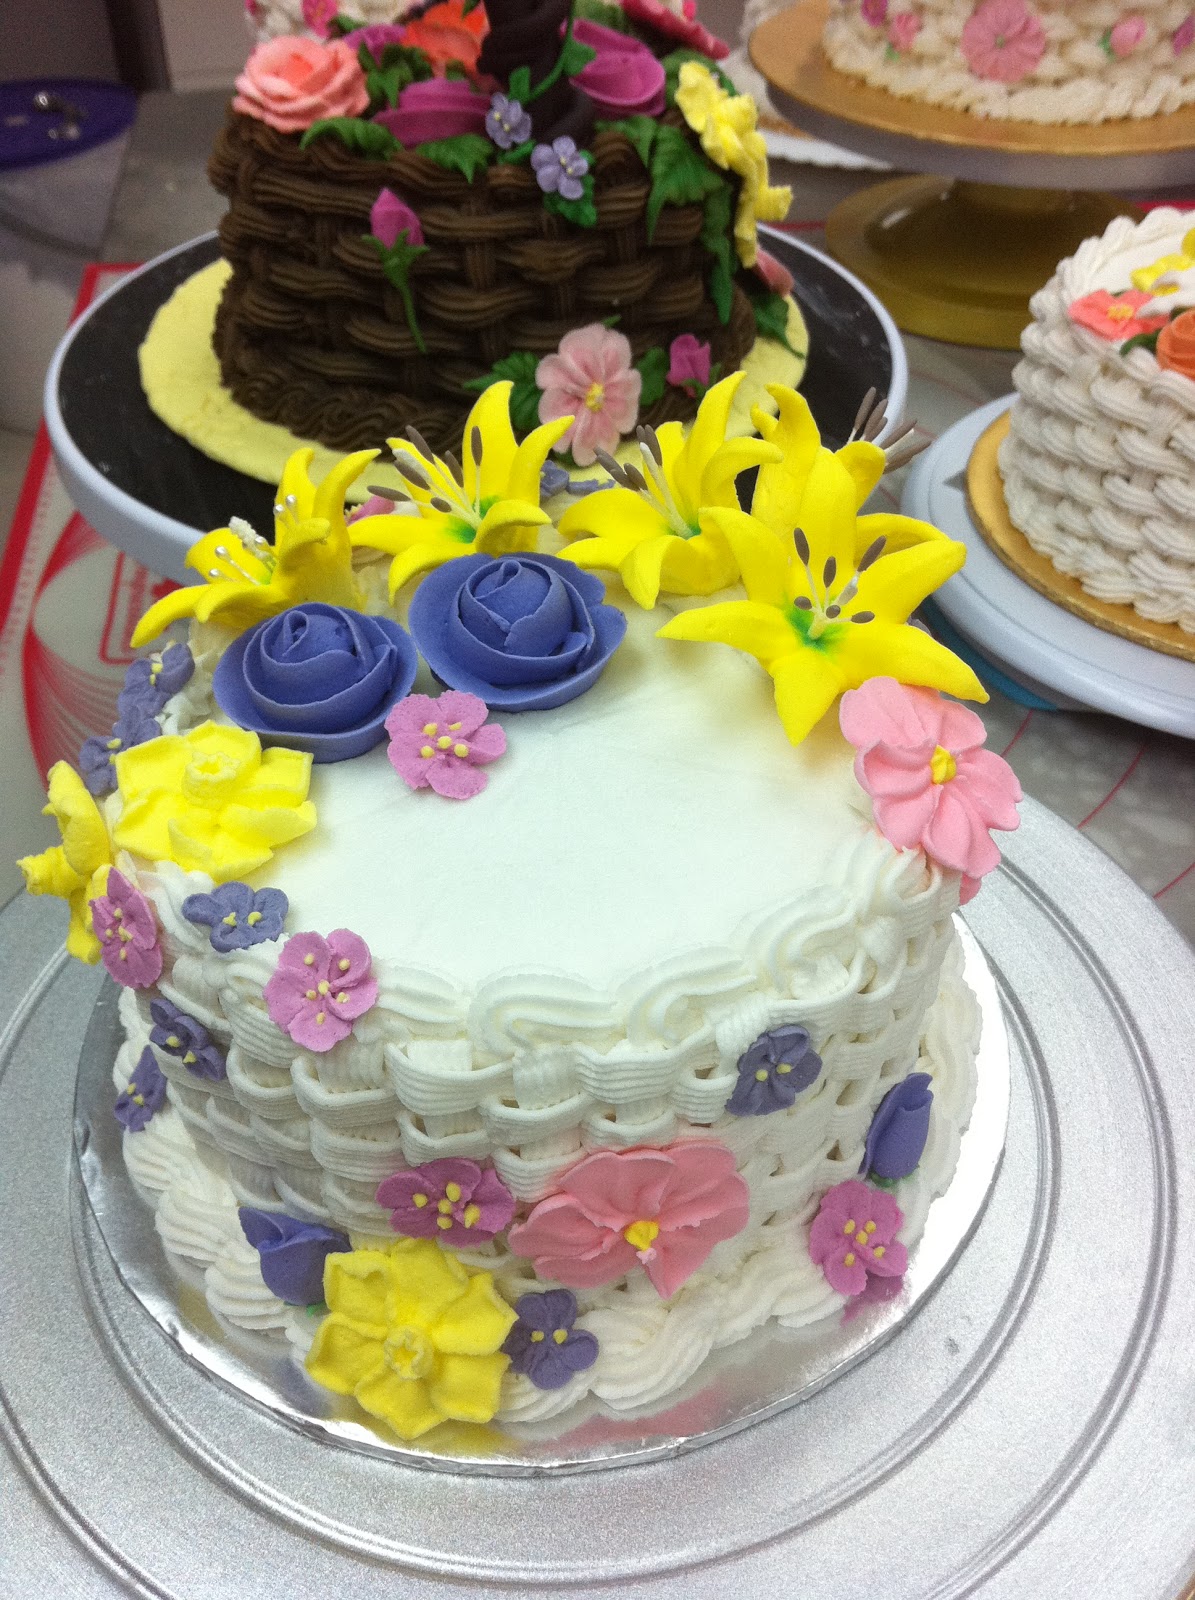
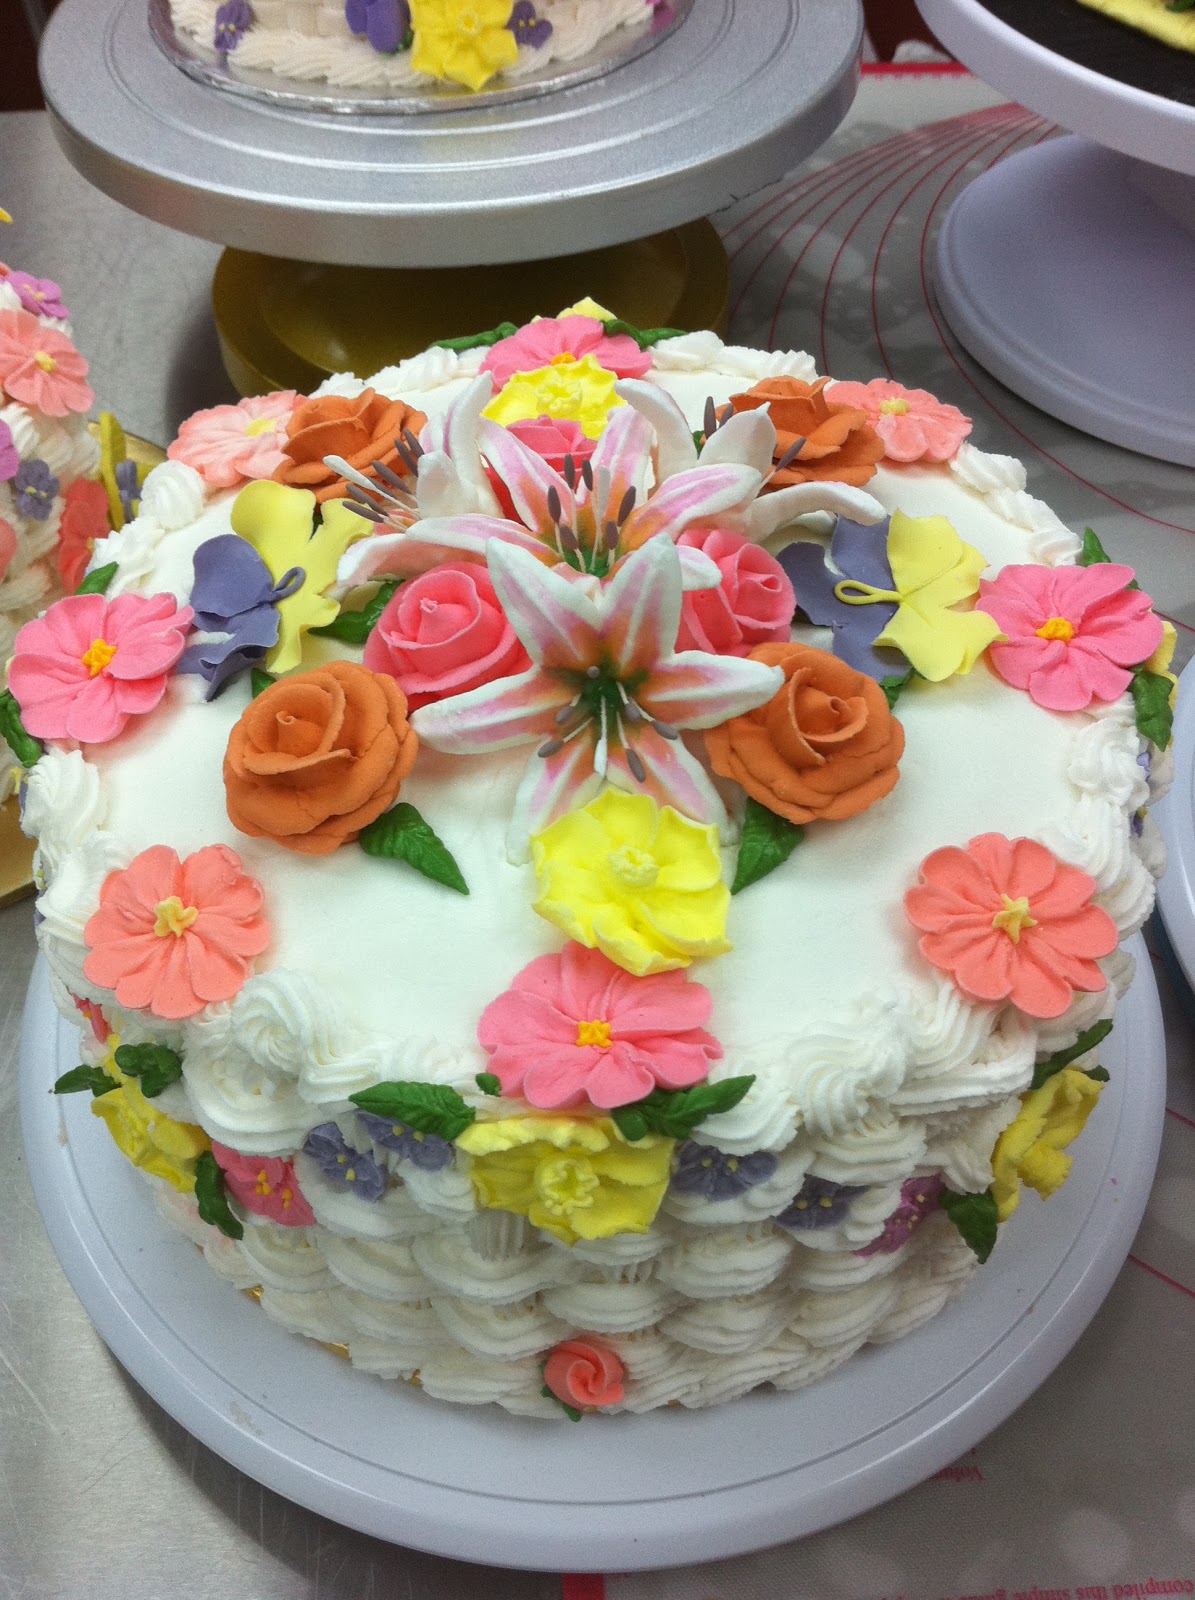
 Then it was time to decorate the cakes with all the flowers we had made prior to coming to class. This was my creation. A symmetrical design.. Muahahha!

 This here was my neighbour Sabrina's creation with her cute fondant bees. The dark coloured basket was made by our instructor Angeline.

 These were my other classmates beautiful creations

 I think the one on the left belongs to Michelle and she made her basketweave with a different tip than the rest of us. Here Sally sempat lagi giving us the peace sign while finishing her masterpiece hehe


Mine again!
 Yeah mine was the big FAT one right in front.
 Fireworks and celebration!!!! I received my second cert in the Wilton Course from Angeline Stanley our instructor.
 A smiling class pic is a must! From the left and I hope I've got the spellings right..Fadia, Michelle, Sally, Sabrina, ME, Pee Lee, Angeline, Misako and the three other ladies I'm not so sure of their names as they just joined us for this course.
 You can't tell here but I was completely knackered but still proudly posing next to my cake.
 In the box and ready to go home.
 And then a quarter in the tummy...hehe..

 So there you go.. the journey for my course two had ended..:) I shall be continuing to Course 3 Fondant and Gumpaste in the Wilton Method of cake decorating series in May along with my perky and gung-ho classmates. We are looking forward to finishing this course together and as expected we became fast friends because of our common interest. Cake decorating...What a great way to make friends!