Announcement : Home May'de Cakes will not be taking orders for events in the whole of December to 12th January.This is due to the Christmas Holiday season and yes being FULLY booked!! I will still take orders for events AFTER those dates so keep on writing to homemaydecakes@gmail.com if you are interested and earlier the better to avoid disappointment! Thanks all!
The Making : Flowers Galore Wedding cake

Hello again! Today my post will be about one of my wedding cake projects. Honestly I modelled this cake after a picture that a customer had shown to me. This was great as I am a very visual person so even when I was not sure of the type of flowers were on it as it was difficult to close up on the picture, I thought I could replicate it quite well. To me the flowers looked like a bunch of pansies and orchids perhaps plus a bigger type of flower which was probably lillies.

There were also leaves on the cake so here I'm rolling out the green gumpaste. As with all my cakes with flowers, I need at least two weeks in advance to make them so if any of you are interested in them, always make your orders way ahead of time so I can plan and make them :)

Here I'm cutting the leaves out with the leaf cutter.

Then imprinting the leaf veins.

Attached the wire to the gumpaste leaves with some gumpaste glue...

And left them to dry..it's good to leave the leaves to dry in random shapes in order for them to look more natural.

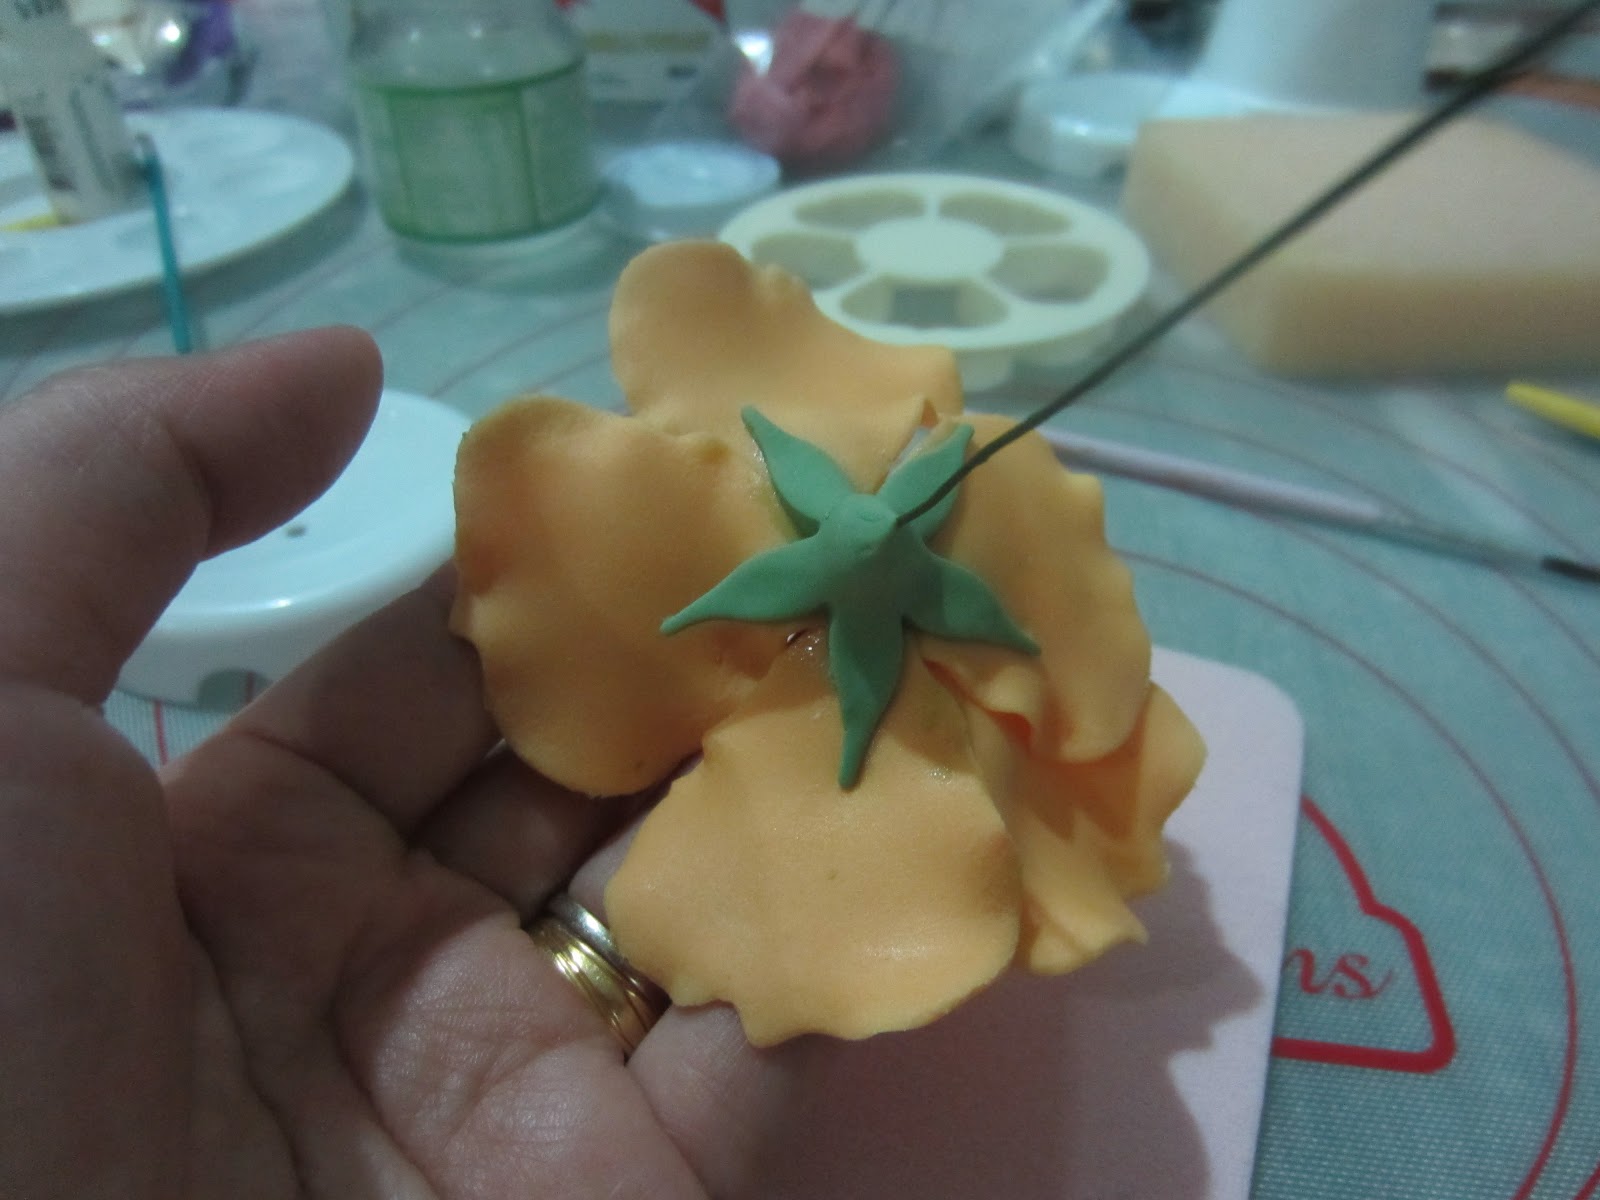
Now for the calyx. I used the mexican hat method as shown in the pic above.

Then I cut out the calyx with a calyx cutter and left it to dry and harden. This is important because the calyx will hold the flower petals so it needs to be firm amd steady.

Before that, I inserted a wire with a hook at the end to act as a stem.

Once the leaves are a little dry but not too dry, I brushed on some green dust to make it more realistic.

Can you see the difference it makes?

So now on to the flowers itself. I cut them out using a rose cutter and tidied up the edges using a brush.

Then I cut each petal and ruffled the edges with a ball tool.

Then I arranged them like so..
..glued them on to the dried calyx...

...and left them to dry on the egg carton..you can also use fruit cartons to if you have them as long as they can maintain a natural flower shape while drying :)

Once the flowers are dry (which usually takes a overnight or a day to do so), I started painting on the details.


Here I did it on the dark pink flowers.

Upon close inspection of the picture I noticed tiny little petals within the flowers itself. So I decided to use a hydrangea cutter to make them.Then I rounded the edges using a bone tool.

Then I cupped the petals using the same tool to create a natural curl.

..dusted on some shimmery dust and left it to dry.


Here I dusted on some green edible dust on the white flowers.

I did the same for its tiny petal inserts.

All this using edible tints and lustre dusts. You may purchase them if interested here.

So this how the flower looked like after attaching the tiny petal inserts.

Next the lily looking flowers..though I'm sure it has a another name ;)

I wired them together like so..

..and then added the stamens in the middle and attached them all together with floral tape.


This is how the finished flowers looked like! My own sugar garden in my baking studio :)


Nearing the day, I baked the cakes fresh..lovely rich layered butter cakes ..some with chocolate mousse fillings and some with yummy St. Dalfour fruit preserve :)

Then I prepared the board and imprinted it with some leaf and vines design.

Covered the cake with fondant and smoothed it over..

Once the fondant was slightly firm, I glued on some silver sugar beads.


After all was done, I arranged the flower to get a feel of how it was going to look like. I sometimes arrange sugar flowers on wedding site but frankly I prefer to see how it is going to look like on the actual day so I can just make minor adjustments on the day itself. You can actually see my Wedding cake POF (Plan Of Action) stuck on the mirror in my baking studio. Haha!

On the day itself, I piped on the royal icing shell borders between the tiers.

The result after two weeks of hard work? A 3 tier beautiful flowers galore wedding cake. So you see a lot goes into the wedding cake of your dreams. If you are interested in ordering your dream wedding cake, please email me at homemaydecakes@gmail.com. Thanks for reading!
The Making : Pretty Posies Ball Cake

Hi all! I've been so occupied by my orders that it takes me quite a while to actually post my projects on this blog. Today I'll be showing you how I did a cake inspired by Lindy Smith's Prettiest Posies ball cake. Lindy Smith is a renowned cake decorator from the UK and has written many cake decorating books. I really love her contemporary style and this cake is one of the few examples of her amazing vision.

First of all, I made a butter walnut cake using two halves of a 6 inch ball pan, covered it in buttercream and let it set in the fridge for it to be easier to cover in fondant later on.

For this cake, I did chrysanthemums and used two different ways of making them.First, a more contemporary peach coloured chrysanthemum and second, a more realistic looking version of the flower in yellow.Lindy Smith's version used silicone flower moulds, easier I guess but I wanted to decorate it without using the moulds :)
While waiting for the buttercream to set, I prepared and cut the petals for the classic chrysanthemum in peach coloured gumpaste.

I pinched the rounded part of the petal and glued it together with edible glue.
 Then I arranged it on a piece of fondant cutout from a round cutter like so. You can make two or three layers.
Then I topped it with a flower cut out from a plunger cutter.

The finished chrysanthemum looked like this in the end.


Next I used a tool called the dresden tool and curved the petals by pressing it from the outside to the middle of the flower.

I pressed a ball tool in the middle to give it a slight curve.

I did the same for all the petals and then arranged them and stuck them together with edible glue on a flower former and let it dry.


Next I made the roses. Instead of the usual classic rose technique, I used a simpler style called the ribbon rose. Basically I just cut out strips of rolled fondant and twisted it round to form a rose. Simple right? Yeah simple if you're only doing one or two flowers.Try 80 for the whole bunch? haha there you will probably faint because I nearly did. Finished the whole thing in two days.

Okay so once the buttercream on the cake was hardened in the fridge, I rolled out some white fondant and quickly covered the ball with it using the stretching and smooth technique.

Then I flipped it over, bunched it together carefully at the bottom and cut of the excess fondant. This is why it's important to have the buttercream really stiff. The ball of cake will be easier to handle and won't slip from your hands. Key words here are WORK FAST!

Here's how it looked like once smoothed over. A pretty adorable ball of cake if I might say.

Next I covered the cake board with fondant and imprinted a pattern unto it.

After that, I placed the ball on the board and started arranging the flowers unto the cake.

Then I attached a green fondant bow on top.

A lovely message was cut out using blue fondant.

Small flower accents to match was also attached.

Voila! The cake was done!

But wait minute... client wanted pink roses instead of white so I brushed on some pink edible dust unto the roses. I felt like the Queen of Hearts in the Alice in Wonderland story when I started doing this. I had to make it perfect else there would be an "OFF WITH HER HEAD!!" moment. LOL.
There you have it a Pretty Posies Ball Cake. Lovely ain't it?
Subscribe to:
Posts (Atom)